Welcome to the world of website creation! You’re at the perfect place if you’re just starting out in the exciting world of creating your own website. This blog article will introduce us to the user-friendly world of Elementor, a robust page builder created specifically for beginners.
Elementor is like the magic wand you’ve been looking for: it transforms your web design ideas into reality without the need for complex coding. This translates to a simpler entry into the realm of website creation for beginners. But why is an easy-to-use page builder like Elementor so important?
Consider a page builder as your digital building kit. Elementor, like LEGO parts, allows you to easily piece together items on your website. It’s like having a creative playground where you can customize every part of your website without worrying about technical details.
So, if you’re ready to go on a beginner-friendly journey to website mastery, join us as we explore the wonders of Elementor and learn how simplicity and creativity exist in the world of online design. Let’s get started.
Table of Contents
Getting Started with Elementor
Installing Elementor is like giving your WordPress website a superpower for design.
Downloading and Installing Elementor on Your WordPress Site:
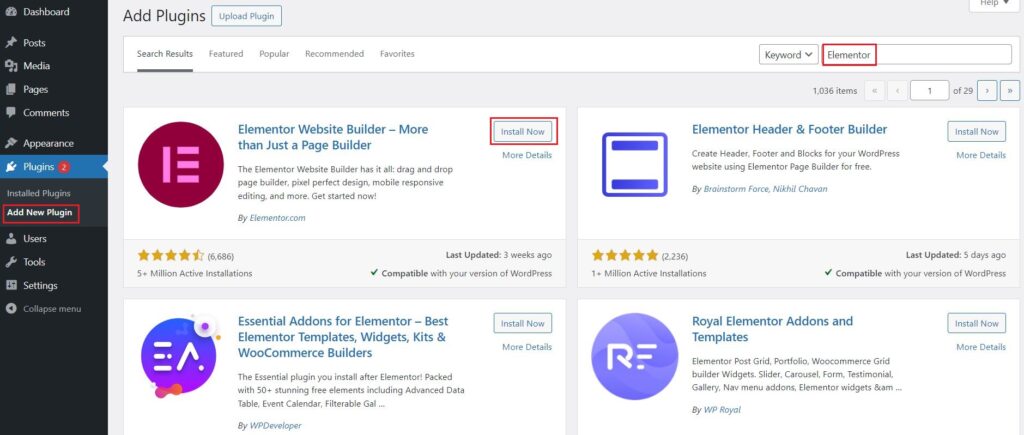
Go to your WordPress website’s dashboard by adding “/wp-admin” to your website’s URL and log in with your credentials. Once logged in, look for the “Plugins” option on the left-hand menu. Click on it to open the plugins page. Within the plugins page, you’ll find an “Add New” button at the top. Click on it to go to the plugin installation page.
In the search bar on the right, type “Elementor” and hit enter. The Elementor plugin should appear as one of the top results. You’ll see the Elementor plugin in the search results. Click on the “Install Now” button next to it. WordPress will now download and install the Elementor plugin for you.
After installation is complete, you’ll see an “Activate” button. Click on it to activate Elementor on your WordPress site. After activation, you should see a “Elementor” option in the WordPress dashboard menu. This means that Elementor has been successfully installed and is ready to use.
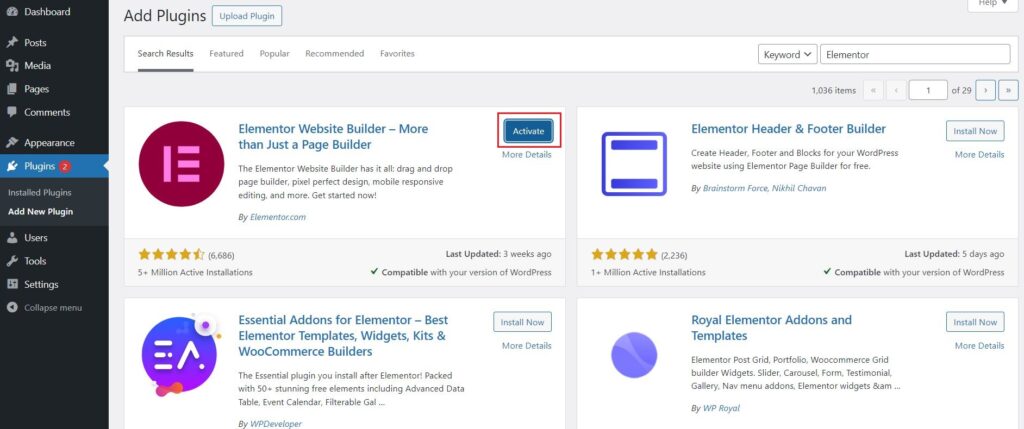
Congratulations! On your WordPress website, Elementor is now installed. By selecting the “Elementor” tab in your dashboard, you can start using the Elementor editor to create beautiful pages and articles.
Configuring Basic Settings for Optimal Performance:
Find the “Elementor” option in the sidebar of your WordPress dashboard. After clicking on it, select “Settings.”
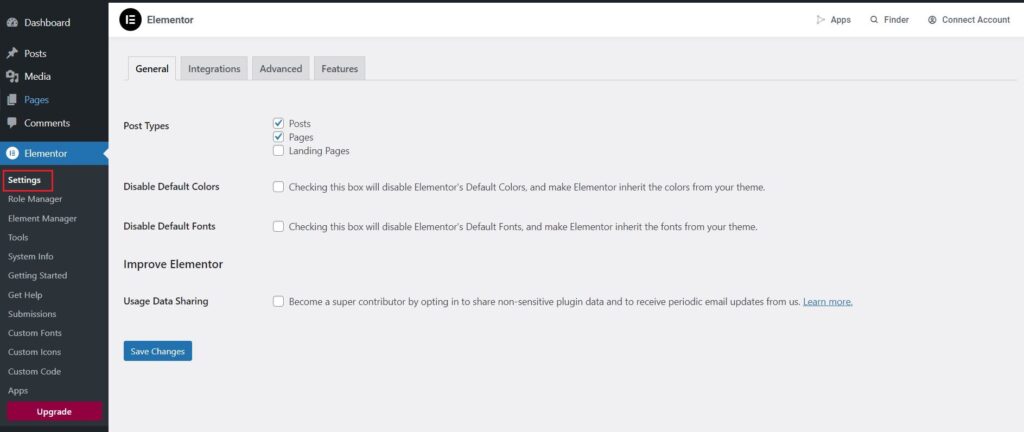
- General Settings:
Here you’ll find general settings. Adjust the default parameters to suit your needs. - Style Settings:
Customize the style choices. Selecting your standard fonts, colors, and other design components falls under this category. - Integration Settings:
Integrate any other tools or services you may be utilizing, such as analytics or email marketing, for a smoother user experience. - Advanced Settings:
For advanced users, there are additional settings. However, as a beginner, you can skip this for now and explore it later. - Save Changes:
Once the options are configured, remember to save your modifications.
Setting Up Your First Project:
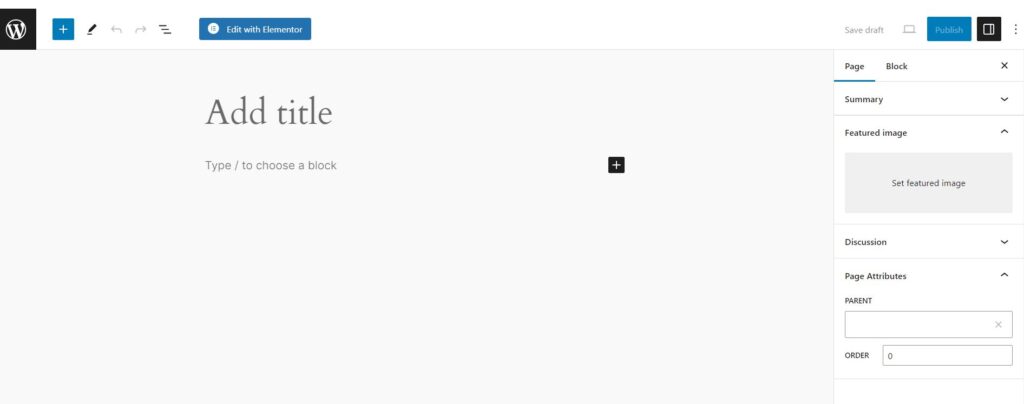
After activation, either create a new page or edit an existing one. You’ll now see a new “Edit with Elementor” button. Click it. You may begin creating your page in the Elementor editor by doing this.
Exploring the User Interface
1. Main Dashboard Features:
The main dashboard with all of the tools you need is located at the top of the Elementor editor.
- Elements: From here, you may add different widgets to your page.
- Templates: Explore pre-designed templates to get your project started.
- Save: Save your work on a regular basis to avoid losing any modifications.
- Preview: Check the appearance of your page before publishing.
- Publish: When you’re finished, click here to publish your changes.
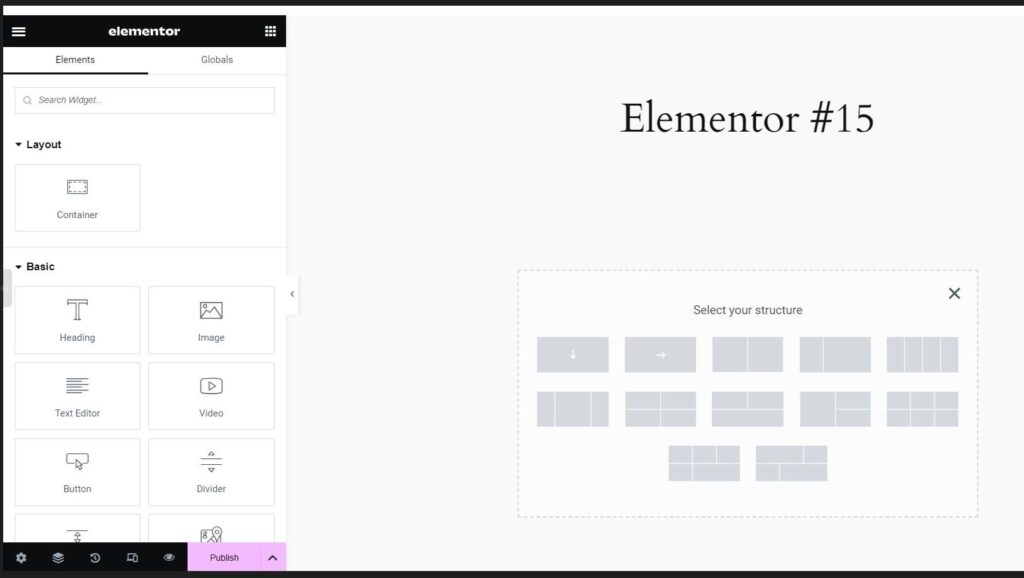
2. Navigating the Elementor Editor:
- There are sections, columns, and widgets within the editor.
- Sections: Consider these the page’s structural components. There are columns in them.
- Columns: You can change the width and position of columns to divide parts into various layouts.
- The components you add to your columns—text, photos, buttons, etc.—are called widgets.
- Left Sidebar: Access more options such as style, advanced options, and page settings.
Creating Your First Page with Elementor
With Elementor, building your first page is a fun and easy process that lets anyone without any coding experience create a beautiful website.
Choosing a Template
Elementor offers a range of professionally designed templates to help you get started on your project quickly. These templates span a variety of fields and styles. Spend some time looking through these choices when you first begin to develop an idea of what works best for your website’s design.
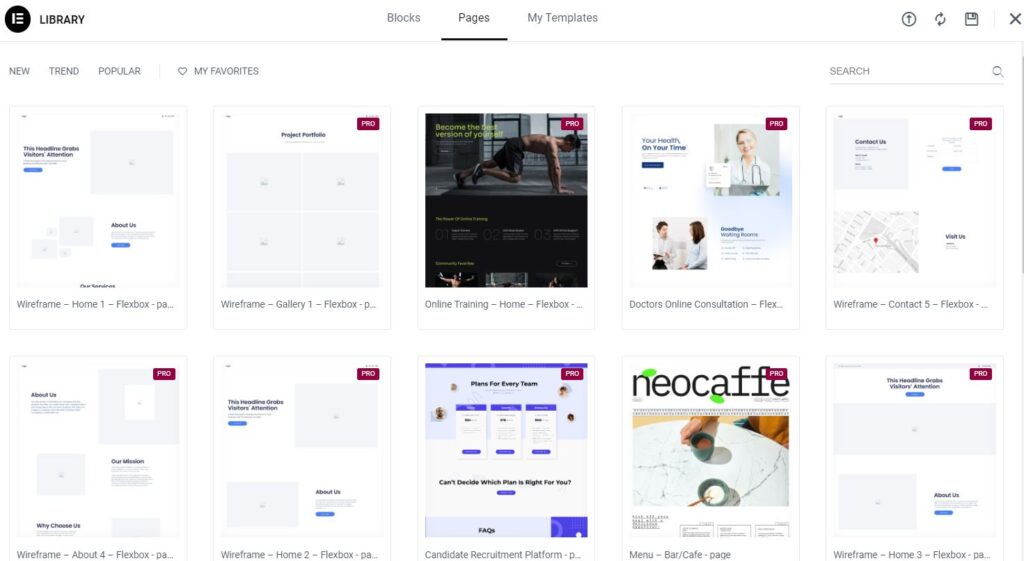
After looking over the templates, select one that fits the theme and goal of your website. Elementor offers templates that may be used to create a variety of websites, including blogs, portfolios, and company sites. You can always modify it later, so don’t stress about making it perfect now.
Building Sections and Columns
A page in Elementor is separated into sections, and each section can have many columns. Add a section to your page to start. Consider a section to be a big container for your content. You can change its background, layout, and other options after it is added.
You can add columns to each section. Columns help you arrange and structure your content. Make sure the column structures in your design are responsive. The number of columns and their widths may be easily adjusted with Elementor, ensuring that your webpage appears good on all devices.
Adding Widgets
Your page’s widgets are its fundamental components. They have components like buttons, images, text, and more. To begin creating your content, simply drag & drop widgets into your columns. A variety of widgets from Elementor allow you to creatively present your thoughts.
Every widget has a unique set of customizing options. You can alter the text, graphics, and styles to match your brand. Experiment around with the parameters until the look you want is achieved. Don’t be afraid to experiment with different setups to see what suits your webpage the best.
Styling and Customization
Style and customization are your hidden weapons when it comes to creating an amazing look for your website. You don’t need to know any code to add a personalized touch to your website using Elementor, a robust page builder.
Global Styles
- Global styles are your website’s superheroes. They make sure that everything has a cohesive stylish look.
- Let’s say you have a preferred font style or color. You just need to create global styles once, and they will magically apply to every element on your website, including buttons, paragraphs, and headers.
- This implies that each time you add a new element, you won’t need to manually alter the font or color. It’s like to hiring a personal stylist for the whole thing!
- Typography : This is the formal term for the style of your writing. The font, size, and even the distance between lines and letters are all customizable.
- Colors : Select a color scheme that defines your style or brand. You may easily switch up the color palette with global styles.
- Spacing : Have you ever noticed that certain websites have the ideal amount of space between each element? You can regulate spacing using global styles, which will help your website seem neat and well-organized.
Element Styling
- Now, let us dive into the specifics. Your page’s element style allows you to draw attention to specific parts.
- Do you want your heading to stand out with an unique font? Element style allows you to do exactly that.
- Every element, whether it’s a button, an image, or a section, may be personalized with a unique touch. It’s similar to styling each component uniquely.
- Elementor provides excellent style solutions for the adventurous. These enable you to move beyond the fundamentals, much like the hidden gems.
- Experiment with gradients, box shadows, and other fun effects to give your designs a distinctive look.
- If you’re not an expert in design, don’t worry; Elementor’s user-friendly interface makes it simple to explore and discover your own look.
Responsive Design
In the world of website design, “responsive design” refers to making sure your website functions and looks good across different kinds of devices, particularly tablets and mobile phones. It’s crucial since different devices are used by people to access the internet, and your website should be compatible with all of them.
Testing and optimizing for mobile responsiveness:
Consider this: you want your website to function and appear as good on a phone as it does on a PC when someone visits it. Testing is the process of ensuring that everything fits and works properly on smaller screens.
- Tools: You may view how your website appears on various devices with the help of internet tools. These will help you identify and fix any problems.
- Visual Appeal: Make sure buttons, text, and images are in the right size for mobile devices. Nobody enjoys zooming in and out to read or click.
Implementing adjustments for various devices
Since different devices have different dimensions, your website must be flexible. Your website should look excellent on all devices, just like an outfit that fits any body type.
- CSS Media Queries: These tell your website how to look on various devices, kind of like instructions. On a small screen, for instance, you might desire bigger buttons.
- Flexibility: Ensure that the components of your website, such as the columns and photos, can adjust to various screen sizes. Everything looks nice and orderly this way.
Saving and Reusing
Understanding the Importance of Saving Regularly
- Emphasize the concept of saving your progress, whether in a video game or a document.
- Describe how regular saving keeps your hard work safe in the event of unexpected issues or problems.
- Encourage users to click the “Save” button at important moments throughout the Elementor creation process.
Utilizing the Elementor Library for Future Use
- Introduce your designs to the Elementor Library, a virtual storage area.
- Describe how you can use sections, columns, or full pages that you save to the library for later use.
- Show customers how to use the Elementor Library, save designs there, and then quickly and easily add saved elements to new pages.
Sharing Your Designs with Others
- Describe a scenario in which a friend or colleague admires your Elementor design and wishes to recreate it for their own website.
- Describe the export function, which enables users to generate a file and share their complete page or particular sections or columns.
- Emphasize the ease of collaboration and design sharing while demonstrating the straightforward export process.
Importing Templates for Quick Website Setups
- Explain that you shouldn’t have to start from scratch every time.
- Describe the time and effort you can save by importing templates from other people or even from previous projects.
- Guide users through the importation process of a template, making sure they understand the possibilities for placement and customization that become accessible after import.
